Microcontroller Intermediate
Kit - Second MC Project - Making More LEDs Blink
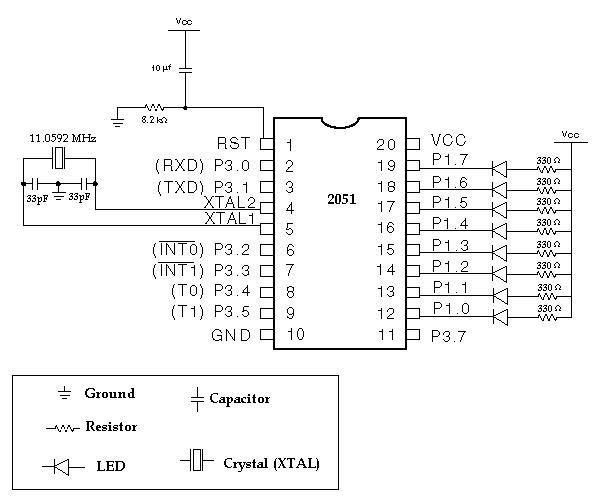
Step 1.) The first step is to build the circuit. At
this point you should be familiar with the parts
used. You can either put these parts together using
a
breadboard or wirewrap. This design is intended
for use with an
Atmel 2051. Most microcontrollers (such as a
normal 8051 or 8751) can not handle the current
required to turn an LED on and off but the ATMEL
part has this capability.
Vcc = 5V and Gnd = 0V
The basic process of
compiling an assembly language program and loading
it into the microcontroller was covered in the
first microcontroller project.In this
project the program is similar. Instead of just
making an LED blink, we are using all of Port 1 on
the 2051 to make an 8 bit counter. The program for
this is ledproj2.asm. It is included on the CD that
comes with the
Microcontroller Beginner Kit. Once you have
compiled the program, download it to the 2051.
Make sure the power is off for
the circuit you have built. Then move
the microcontroller to the circuit.
Turn on the power to the
circuit. The LEDs should all come on. Then they
should start blinking on and off as the counter
counts up from 0 to 255 (all on to all off).